Tuesday, 13 August 2019

How to Grow Sweet Peas?

Common names: pea, sweet pea, garden pea, sugar pea, English pea
Botanical name: Pisum sativum
Origin: Europe, Near East
Varieties Shelling types: Little Marvel (62 days); Frosty (64 days); Wando (75 days); Dwarf Grey Sugar (65 days). Edible-pod types: Giant Melting (65 days); Melting Sugar (69 days); Oregon Sugar Pod (75 days); Sugar Snap (65 days).

Description
Peas are hardy, weak-stemmed, climbing annuals that have leaf like stipules, leaves with one to three pairs of leaflets, and tendrils that they use for climbing. The flowers are white, streaked, or colored. The fruit is a pod containing four to 10 seeds, either smooth or wrinkled depending on the variety. Custom has it that you can make a wish if you find a pea pod with nine or more peas in it. Edible-pod peas are a fairly recent development. Grow them the same way as sweet peas, but harvest the immature pod before the peas have developed to full size.

Peas have traditionally been a difficult crop for the home gardener to grow, with yields so low that it was hardly worth planting them. The introduction of the new easy-to-grow varieties of edible-pod peas has made growing peas a manageable undertaking for the home gardener, and no garden should be without them. All you need to grow peas is cool weather and a six-foot support trellis.

Where and when to grow
Peas are a cool-season crop that must mature before the weather gets hot. Ideal growing weather for peas is moist and between 60° and 65°F, Plant them as soon as the soil can be worked in spring about six weeks before the average date of last frost.

How to plant
Peas tolerate partial shade and need good drainage in soil that is high in organic material. They produce earlier in sandy soil, but yield a heavier, later crop if grown in clay soil. Although soaking seeds can speed germination, a lot of seed can be ruined by over soaking, and peas are harder to plant when they're wet, because the seeds tend to break. Before planting, work a complete well-balanced fertilizer into the soil at the rate of one pound per 100 square feet or 10 pounds per 1,000 square feet. Plant the peas two inches deep, one to two inches apart, in rows 18 to 24 inches apart.

Fertilizing and watering
Fertilize before planting and again at midseason, at the same rate as the rest of the garden. Detailed information on fertilizing is given in "Spadework: The Essential Soil" in P a r t i. Peas need ample moisture; don't let the soil dry out. When the vines are flowering, avoid getting water on the plants; it may damage the flowers and reduce the crop.

Special handling
Provide trellises to support the pea vines. Cultivate very gently to avoid harming the fragile roots.

Pests
Aphids, rabbits, birds, and people are attracted to pea vines. Control aphids by pinching out infested foliage or by hosing them off the vines. Fence out the rabbits, and discourage birds with a scarecrow. Stern words may do the trick with human trespassers. Despite this competition, peas are an excellent crop for any garden.
Diseases
Peas are susceptible to rot, wilt, blight, mosaic, and mildew. New, highly disease-resistant varieties are available; use them to cut down on disease problems in your garden. You will also lessen the incidence of disease if you avoid handling the vines when they're wet, and if you maintain the general health and cleanliness of the garden. If a plant does become diseased, remove and destroy it before it can spread disease to healthy plants.
When and how to harvest

Time from planting to harvest is from 55 to 80 days. A 10-foot row may give you about three pounds of pods. Pick shelling peas when the pods are full and green, before the peas start to harden. Over mature peas are nowhere near as tasty as young ones; as peas increase in size, the sugar content goes down as the starch content goes up. Sugar  will also begin converting to starch as soon as peas are picked. To slow this process, chill the peas in their pods as they are picked and shell them immediately before cooking. Harvest edible-pod peas before the peas mature. Pods
Should be plump, but the individual peas should not be completely showing through the pod.

Storing and preserving

Storing fresh shelling peas is seldom an issue for home gardeners; there are seldom any left to store but they can be stored in the refrigerator, unshelled, up to one week. You can sprout, freeze, can, or dry peas. Dried peas can be stored in a cool, dry place for 10 to 12 months. Edible-pod peas are also so good raw that you may not even get them as far as the kitchen. If you do have any to spare, you can store them in a plastic bag in the refrigerator for seven to 10 days. Edible-pod peas also freeze well and, unlike shelling peas. lose little of their flavor when frozen. Detailed information on storing and preserving is given in Part 3.

Serving suggestions
Freshly shelled peas are a luxury seldom enjoyed by most people. Cook them quickly in a little water and serve them with butter and chopped mint. Or add a sprig of mint during cooking. Fresh peas and boiled new potatoes are the perfect accompaniment for a lamb roast. Toss cold, cooked peas into a salad, or add them to potato salad — throw in diced cooked carrots as well, and you've got a Russian salad. Simmer peas in butter with a handful of lettuce tossed in at the end of the cooking time or try lining the pot with lettuce leaves and cooking the peas briefly over low heat. Add a few sautéed mushrooms or onions for a sophisticated vegetable dish. Add edible pod peas to a stir-fry dish — the rapid cooking preserves their crisp texture and delicate flavor. Eat them raw, or use them alone, lightly steamed, as a side dish.

Pea Black Eyed
Common names: pea, black-eyed pea, cowpea, chowder pea, southern pea, black-eyed bean, China bean
Botanical name: Gigna sinensis
Origin: Asia
Varieties; California Black Eye (75 days); Pink Eye Purple Hull (78 days); Mississippi Silver (80 days).
Description
Black-eyed peas are tender annuals that can be either bushy or climbing plants, depending on the variety. The seeds of the dwarf varieties are usually white with a dark spot (black eye) where they're attached to the pod; sometimes the spots are brown or purple. Black-eyed peas originated in Asia. Slave traders brought them to Jamaica, where they became a staple of the West Indies' diet.

Where and when to grow
Unlike sweet peas, black-eyed peas tolerate high temperatures but are very sensitive to cold — the slightest frost will harm them. They grow very well in the South, but they don't grow well from transplants, and some Northern areas may not have a long enough growing season to accommodate them from seeds. If your area has a long enough warm season, plant black-eyed peas from seed four weeks after the average date of last frost.

How to plant

Black-eyed peas will tolerate partial shade and will grow in very poor soil. In fact, like other legumes, they're often grown to improve the soil. Well-drained, well-worked soil that's high in organic matter increases their productivity. When you're preparing the soil for planting, you have to work in a complete, well-balanced fertilizer at the rate of one pound per 100 square feet or 10 pounds per 1,000 square feet. Sow seeds half an inch deep and about two inches apart in rows two to three feet apart; when the seedlings are large enough to handle, thin them to three or four inches apart.

Fertilizing and watering
Fertilize before planting and again at midseason, at the same rate as the rest of the garden. Detailed information on fertilizing is given in "Spadework: The Essential Soil" in P a r t i. Don't let the soil dry out, but try to keep water off the flowers; it may cause them to fall off, and this will reduce the yield.

Pests
Beetles, aphids, spider mites, and leafhoppers attack black-eyed peas. Control aphids and beetles physically by hand-picking or hosing them off the plants, pinch out aphid-infested vegetation, or using a chemical spray of Diazinon or Malathion. Hose leafhoppers off the plants or spray with carbaryl. Spider mites are difficult to control even with
The proper chemicals; remove the affected plants before the spider mites spread, or spray the undersides of the foliage with Diazinon.

Diseases
Black-eyed peas are susceptible to anthracnose, rust, mildews,mosaic, and wilt. Planting disease-resistant varieties when possible and maintaining the general cleanliness and health of your garden will help cut down the incidence of disease. To avoid spreading disease, don't work with the plants when they're wet. If a plant does become infected, remove it before it can spread disease to healthy plants.

When and how to harvest
Time from planting to harvest is from 70 to 110 days. You can eat either the green pods or the dried peas. Pick pods at whatever stage of maturity you desire — either young and tender or fully matured to use dried.

Storing and preserving

Unshelled black-eyed peas can be kept up to one week in the refrigerator. Young black-eyed peas can be frozen, pod and all; the mature seeds can be dried, canned, or frozen. Dried shelled black-eyed peas can be stored in a cool, dry place for 10 to 12 months.

Serving suggestions
Eat young black-eyed peas in the pod like snap beans; dry the shelled peas for use in casseroles and soups. Combine cooked black-eyed peas and rice, season with red pepper sauce, and bake until hot; or simmer the peas with pork or bacon for a classic Southern dish.

60 Seconds Habit ! That Reversed Type 2 Diabetes and Melted 56 lbs of Fat


Thursday, 27 June 2019

Betony Wood (Betonica OJicinalis)

Description
The common wood betony had many leaves rising from the root. Which are somewhat broad and round at the end? It is roundly dented about the edges, standing upon long foot stalks, from among which rise up small, square, slender, but upright hairy stalks. There is with some leaves thereon, to a piece at the joints, smaller than the lower. Whereof are set more than a few spiked heads of flowers like lavender. Hence it is thicker and shorter for the most part, and of a reddish and purple color, spotted with white spots both in the upper and lower part.
Also, the seeds being contained in the husks that hold the flowers are blackish, somewhat long and uneven. The roots are a lot of white thread strings; the stalk perished, but the roots with some leaves thereon, abide all the winter. The whole plant is somewhat small.
It growth is normally in woods and delighted, in shady places.  It flowers comes in July, after when the seed is swiftly ripped, yet in its prime in May. The herb is appropriated to the planet Jupiter, and the sign Aries. Antonius Mum, physician to the Emperor Agustus Ctesar, wrote a peculiar book of the Virtues of this herb.
Use of Betony Wood
It is among other virtue said of it, that it preserved the liver and body of man from the danger of epidemical diseases. It also helps in from witchcraft also and supports those that loathe or cannot digest their meal. Moreover, those who have weak stomachs or sour belching and continual rising in their stomach using it closely either green or dry. Either the herb or root, or the flowers in broth, drink, or meat, or made into conserve syrup, water, electuary, or powder. As everyone may beat frame themselves unto, or as the time or season required; taken any of the aforesaid ways.
It supports in the jaundice, falling sickness, the palsy, convulsions, shrinking of the sinews, the gout, and those that are inclined to dropsy, those that have continual pains in their heads, although it turn to frenzy. The powder mixed with pure honey is no less available for all sorts of coughs or colds, wheezing, or shortness of breath, distillations of thin rheum’s upon the lungs, which caused consumptions.
The decoction made with mead and a little pennyroyal. It is good for those that are troubled with putrid agues, whether quotidian, tertian, or quartan and to draw down and evacuate the blood and humors. That by falling into the eyes, do hinder the sight. The decoction thereof made in wine, and taken, killed the worms in the belly, opened obstructions both of the spleen and liver. It cured stitches and pains in the back or sides.
The torments and griping pains of the bowels and the wind cholic, and mixed with honey purged the belly. It helped to bring down women's courses, and is of special use for those that are troubled with the falling down of the mother. The pains thereof, and caused an easy and speedy delivery of women in child-birth. It helped also to break and expels the stone, either in the bladder or kidneys. The decoction with wine gargled in the mouth eased the toothache.
It is suggested against the stinging or biting of venomous serpents, or mad dogs, being used inwardly and applied outwardly to the place. A dram of the powder of betony, taken with a little honey in some vinegar, doth magnificently refresh those that are over wearied by travel. It stayed bleeding at the mouth and nose, and helps those that evacuate blood, and those that are bursten or have a rupture, and is good for such as are bruised by any fall or otherwise.
Moreover, the green herb bruised, or the juice affect to any inward hurt, or outward green wound in the head or body. It will speedily heal and close it up: as also any veins or sinews that are cut; and will draw forth a broken bone or splinter, thorn or other things got into. It is no less profitable for old and filthy ulcers; yes, though they are fistulous and hollow. But some do advice to put a little salt to this purpose, being applied with a little hog's lard. Further, it helped a plague or sore and other bile’s and pushes.
The fume of the decoction while it is warm received by a funnel into the ears, eased the pains of them, destroys the worms, and cured the running sores in them: the juice dropped into them doth the same. The root of betony is displeasing both to the stomach and taste.  Whereas, the leaves and flowers, are having their sweet and spicy taste, are comfortable both to meat and medicine.
These are some of the many virtues Antonius Musa, an expert physician, for it was not the practice of Octavius Caesar to keep fools about him appropriates to betony. It is a very precious herb that is certain, and most fitting to be kept in a man's house. So, hence it is both in syrup, conserve, oil, ointment, and plaster. The flowers are usually conserved. 

60 Seconds Habit ! That Reversed Type 2 Diabetes and Melted 56 lbs of Fat

Read More - Coriander or Coriandrum Sativum ! A Hardy Annual Herb

Tuesday, 4 June 2019

Kohlrabi - A Member of Cabbage Clan

Description
Kohlrabi is a hardy biennial grown as an annual and is a member of the cabbage clan. It has a swollen stem that makes it looks like a turnip growing on cabbage root. This swollen stem can be white, purple, or green, and is topped with a rosette of blue-green leaves. In German, kohl means cabbage and rabi means turnip a clue to the taste and texture of kohlrabi, though it is mild and sweeter than either of them.
Kohlrabi is a fair addition to the vegetables grown in northern Europe. In this countryside, nobody paid any attention until the 1800s. Kohlrabi is a biennial vegetable, a low, stout cultivar of wild cabbage. Kohlrabi is a similar species like cabbage, cauliflower, broccoli, kale, Brussels sprouts, collard greens, Savoy cabbage, and gai lan.

Where and When to Grow?

All Cole crops are hardy and can tolerate low 20°F temperatures. Kohlrabi tolerates heat better than other members of the cabbage family, but planting should be timed for harvesting during cool weather. Kohlrabi has a shorter growing season than cabbage. It grows best in cool weather and produces better with a 10° to 15°F difference between Day and night temperatures.
Those areas which have cold winters, so, plant for summer to early fall harvest. The South plant to harvest in late fall or winter. With spring plantings, start kohlrabi early so that most growth will occur before the weather gets too hot.

How to Plant Kohlrabi?

Kohlrabi likes fertile, well-drained soil with a pH within the 6.5 to 7.5 range. This discourages disease and lets the plant make the most of the nutrients in the soil. The soil should be high in organic matter. When preparing the soil for planting, work in a complete, well-balanced fertilizer at the rate of one pound per 100 square feet or 10 pounds per 1,000 square feet.
Cole crops are generally grown from transplants except where they’re’s a long cool period. Kohlrabi, however, can be grown directly from seed in the garden. Sow seeds in rows 18 to 24 inches apart and cover them with a quarter to a half inch of soil. When the seedlings are growing well, thin them to five or six inches apart you can transplant the thinning. Kohlrabi to cultivate cautiously to keep away from harming the shallow roots

Fertilizing and Watering

Fertilize before planting and again at midseason, at the same rate as the rest of the garden. The Essential Soil for Kohlrabi should have even moisture or it will become woody. In spite of it’s general names, it is not the same species as a turnip.

Pests & Diseases

The cabbage family’s traditional enemies are cutworms and caterpillars. Cutworms, cabbage loopers, and imported Cabbage worms can all be controlled by spraying with bacillus thuringiensis, an organic product also known as Dipel or Thungicide. Also, cabbage family crops are susceptible to yellows, club root, and downy mildew.
Lessen the incidence of disease by planting disease-resistant varieties when they're available; maintaining the general health of you’re garden, and avoiding handling the plants when the wet. If a plant does become infected, remove and destroy it so it cannot spread the disease to healthy plants.

Storing and Preserving

Kohlrabi will store for one week in a refrigerator or for one to two months in a cold, moist place. Kohlrabi can also be frozen. Some varieties of Kohlrabi are grown as feed for cattle. In the second year, Kohlrabi blooms and develops seeds, and comes in three different colors: white, purple, and pale green.

Serving Suggestions

Kohlrabi can be eaten raw or cooked. Edible preparations are made with both the stem and the leaves. Small, tender kohlrabi is deliciously steamed, without peeling. As they mature you can peel off the outer skin, dice them, and boil them in a little water. Kohlrabi can also be stuffed, like squash- Try young kohlrabi raw, chilled, and sliced; the flavor is mild and sweet, and the vegetable has a nice, crisp texture.
You can also cook kohlrabi, then cut it into strips and marinate the strips in an oil and vinegar dressing; chill this salad to serve with cold cuts. Cooked kohlrabi can be served just with seasoning and a little melted butter or mashed with butter and cream. For a slightly different flavor, cook it in bouillon instead of water. Also, the bulbous kohlrabi stem is often used raw in salad or slaws. It has a texture alike to that of a broccoli stem, but with a flavor that is sweeter and less vegetal.

Varieties of Kohlrabi

Many Kohlrabi varieties are usually available, including ‘White Vienna’, ‘Purple Vienna’, ‘Grand Duke’, ‘Gigante’, ‘Purple Danube’, and ‘White Danube’. The coloration of the purple types is superficial: the edible parts are all pale yellow. The leafy greens can also be eaten. One common variety grows without a swollen stem, having just leaves and a very thin stem, which is called Haakh. The Monj and Haakh are famous Kashmiri dishes made using this vegetable. Read More – Why You Need to Eat More Vegetables?

Friday, 17 May 2019

Basil- The Herb of Love


Romans once considered basil to be the herb of love and in parts of Italy. It is still referred to as “bacia-nicola” or “kiss-me-Nicholas.” Basil is also called great basil or Saint-Joseph's-wort, is a culinary herb of the family Lamiaceae.  The Romans also believed that the gardener planting the basil must curse and insult it in order to make the herb flourish. As a native of India, basil is a sacred herb in the Hindu religion. Basil the leaf is placed on the dead in burial ceremonies to ensure that the gates of heaven will open for them.

Description
As one of the most popular herbs, basil is widely used throughout the world. While there are many different types of basil, sweet basil is the most common. Sweet basil plants have large, oval, bright green leaves with small white flower clusters. The aroma is a complex mix of sweet and spicy with a strong and fresh clove-like scent. Much like its aroma, sweet basil’s flavor is warm and peppery, with a hint of clove and undertones of mint and anise.

Culinary Uses
Basil tastes great in tomato and pasta dishes but it also gives a sweet-scented, minty aroma when crumbled over baked chicken, lamb or seafood. When making pesto or its French cousin pistou, sweet basil will yield the best results. Basil turns black when cooked in an acid medium like tomato sauce. Adding basil towards the end of cooking will serve to retain its aroma and flavor. It blends well with garlic, thyme, and oregano. Basil leaves can be torn, chopped or shredded; however, cutting will bruise the leaf and cause it to darken quickly.

Other Uses
Some people believe putting whole basil plants on a window sill will deter flies. Basil is also used in aromatherapy products, as a landscape plant, and it is even dried and pressed as a part of homemade paper.

Storing
Fresh basil, kept loosely wrapped in a plastic bag, will last about one week in the refrigerator, provided the leaves are not wet.


Thursday, 28 March 2019

The Crispy and Crunchy Cashew Nuts


The creamy, crispy and crunchy cashew nuts are cherished for their succulent flavor. They are eaten as a snack, whether roasted, salted, sugared or covered in chocolate, and are often used as a flavorful complement to appetizers, main dishes, and desserts.
Slightly sweet in taste they are relished as a garnish in sweets and desserts.  Along with almonds, they are sprinkled over desserts, particularly sundaes and other ice cream based preparations and is widely used in biscuits, sweets, and cakes.
They are also used in Thai and Chinese cuisine, generally in the whole form as well as used, along with almonds and other dry fruits in various rice dishes and in curry preparations in India, Pakistan and Middle Eastern region.
But that is not all there is to cashew nuts. They are packed with a mix of nutrients and minerals not found in many common foods. Cashew nuts are rich in energy and nutrients. They do have a relatively high-fat content, but it is considered good fat. They are rich in heart-friendly monounsaturated fatty acids like oleic and palmitoleic acids that help to lower LDL or bad cholesterol and increase HDL or good cholesterol.
Despite having a relatively high-fat content, cashew nuts are considered to be low-fat nuts. In fact, cashew nuts contain less fat per serving than many other popular nuts, including almonds, walnuts, peanuts, and pecans.
Cashew nuts are a rich source of soluble dietary fiber, vitamins, and minerals as well as numerous health promoting phytochemicals that, combined with the nut’s zero percent cholesterol content, help to protect against diseases like diabetes and gallstones as well as cancer.
Being a rich source of minerals like manganese, potassium copper, iron, magnesium, zinc, and selenium, eating just a handful of cashew nuts every day protects against mineral deficiencies. They are also rich in many essential vitamins such as pantothenic acid (Vitamin B5), pyridoxine (Vitamin B-6), riboflavin and thiamin (Vitamin B-1).  These vitamins are essential for the metabolism of protein, fat, and carbohydrates in the body but need to be replenished from external sources.
The nuts also contain a good amount of Zea-xanthin, an important flavonoid antioxidant, which helps prevent age-related macular degeneration.
The high energy density and high amount of dietary fiber have a beneficial effect on weight management, but only when eaten in moderation. Because of their high-fat content, over-consumption of cashew nuts, can cause unwanted weight gain. The oxalates in cashews also become concentrated in body fluids, crystallizing and causing health problems in people with pre-existing kidney or gallbladder problems. Cashew nut allergy is common, especially in children. The symptoms may range from simple itching to severe form of anaphylactic manifestations, including breathing difficulty, pain in the abdomen vomiting and diarrhea. Individuals with known allergic reactions to nuts should be cautious while eating cashews.
While cashew nuts have a high amount of the stabilizing oleic acid, a monounsaturated fatty acid, they should always be stored in a tightly sealed container in a cool dry place, preferably kept in a refrigerator to avoid them turning rancid.
Native to equatorial South America, the Portuguese and Spanish seafarers are credited for introducing the cashew nut to the world during the 15th and 16th centuries. Today it is grown commercially in Brazil, Vietnam, Indian and many Africans countries. The tree is small, spreading and evergreen growing to a height of 10-12 meters.
The kidney-shaped cashew nuts are actually seeds, that grow, partly embedded, on the end of the large fleshy cashew apple. The crispy kernel is extracted after cutting the shell of the nut and is processed to free it from toxins before use. The edible part is creamy white in color, has a smooth surface with firm yet delicate texture and smells and tastes sweet and delicious. The English name cashew is derived from the Portuguese name for the fruit of the cashew tree, “caju” in the subcontinent it is known as “kaju”.

The cashew tree, now naturalized in tropics, is grown under varied climatic and soil conditions and thrives in a tropical climate and coastal sandy land. Unfortunately, it is not cultivated in Pakistan, though it is successfully cultivated in other regions akin to our warm areas. As the cashew nut can grow in tropical coastal belts, it is worth trying to explore its prospects of growth in Pakistan warm areas.

As it is an expensive item not only at home but also in the international market. It is, therefore, worth trying to cultivate it in Pakistan, in pockets where weather and soil conditions are suitable. If the results are encouraging, it can open new vistas of employment to the local people in production processing and packing industries. 
Also Read - Cashew Nuts – Strange Paradise Superfood


Thursday, 14 March 2019

The Black Sapote – Chocolate Pudding Fruit

The Black Sapote “Diospyros nigra” is a species of persimmon in the family Ebenaceae. It is also called “chocolate pudding fruit” and black snap apple. Black Sapote is tropical fruit mostly grown in Mexico, Central America, The Caribbean, and Colombia. Sapote means soft edible fruit, has no relation with white sapote or mamey sapote. The tree can grow to 25 meters in height. It is an evergreen tree but frost sensitive and can tolerate light frosts. Black Sapote unripe fruits are astringent, caustic, bitter, irritating and have been used as fish poison in the Philippines.
The tree leaves are elliptic-oblong, tapered, dark green, glossy and 10 to 30 long. Black Sapote tree is normally found below 600 meters. The tree propagation is usually from seed required 30 days to germinate. It can retain viability for several months. Some trees are seedless, however, and can be propagated by air-layering or shield budding. The tree takes three to four years to grow should be spaced 10 to 12 meters apart. Normally, trees bear male and female flowers. But in some cases, a tree can bear male flowers. The fruit takes 4 to 5 years from seed. The tree flowers appear in the leaf axils, solitary or in small clusters are tubular and small.
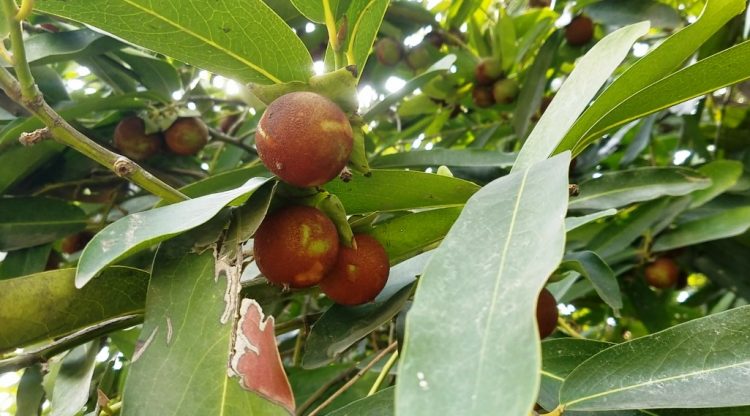
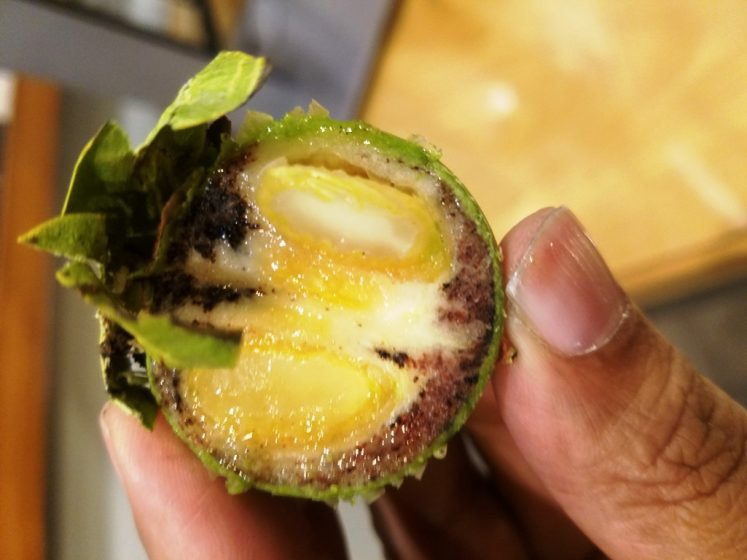
The fruit is tomato likes with an inedible skin that turns from Olive to a deep yellow-green when ripe black markings near the heart of old trunks. The pulp is white and inedible but assumes a flavor, color and texture often likened to chocolate pudding when ripe. Most of the fruits normally contain a maximum of 12 seeds. Its texture like to papaya having the taste and consistency of chocolate pudding. The tree is sensitive to drought, need irrigation in dry areas. If you want to grow Black Sapote in a pot then it is possible. Normally, commercial growers plant seedlings in the pot until they become one to two feet tall before planting them on the ground.
The tree range in size and hairlines of leaves, shapes, seediness, flesh color and sweetness of fruit, time of fruiting suggest that considerable genetic variability exists. A healthy tree normally produced 450 kg per tree. The Black Sapote has various names like Diospyros Digyna, Diospyros Nigra, Black Persimmon, Chocolate-Fruit, Chocolate Pudding Fruit, Zapote Negro, Schwarze Sapote, Zapote Prieto, Chocolate Persimmon.
The sapote fruit can be eaten fresh, or with milk. However, this fruit also served as a dessert, accompanied by ice cream, milk, whipped cream, lemon juice, and orange juice. Black sapote tree doesn’t require much fertilizer; hence the organic fertilizer is sufficient. The sapote is pest free, but in rare cases, it can be infected by scales; by cochineals in winter or with spider mites in the summer.

Health Benefits of Black Sapote

Black sapote gear up on vitamin C, about 100gm offering of the fruit will take care 25% of daily intake, and contains about 20mg of it. It has also a good amount of vitamin A directly from the diet is a healthy practice. Black sapote can be considered quite a good source of potassium about 350mg. The tree benefits of building muscle control the heart’s electrical activity and maintains the fluid-electrolyte balance.
The tree contains a fair amount of calcium at about 22mg per 100gm. Black sapote provides iron in trace amounts after all packed with such a variety of vitamins and minerals? The pulpy nature of this fruit is healthy for the digestive processes. When eaten raw, it is a source of dietary fiber. Black sapote also gives you an instant dose of energy. Read About - Ficus – The Most Popular House Plant 
Source: CP
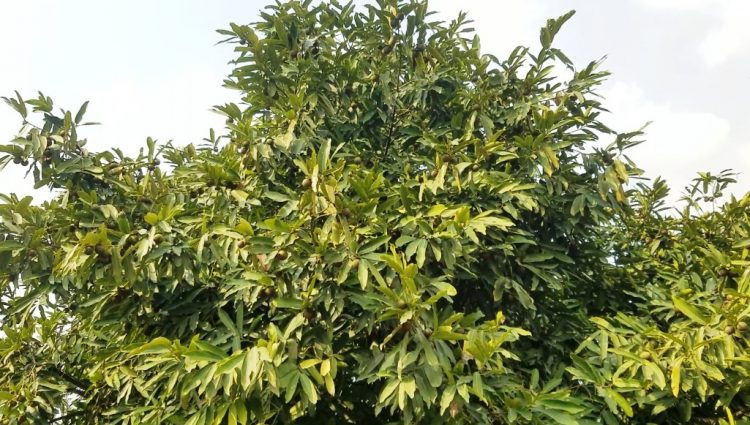
Black Sapote tree can grow to 25 meters in height. It is an evergreen tree but frost sensitive and can tolerate light frosts. Black Sapote tree can grow to 25 meters in height. It is an evergreen tree but frost sensitive and can tolerate light frosts.[/caption][caption id="attachment_27740" align="aligncenter" width="696"]The Black Sapote “Diospyros nigra” is a species of persimmon in the family Ebenaceae. It is also called “chocolate pudding fruit” Diospyros nigra is a species of persimmon in the family Ebenaceae. It is also called “chocolate pudding fruit”[/caption][caption id="attachment_27743" align="aligncenter" width="696"]The fruit are tomato likes with an inedible skin that turns from Olive to a deep yellow-green when ripe black markings near the heart of old trunks. The fruit are tomato likes with an inedible skin that turns from Olive to a deep yellow-green when ripe black markings near the heart of old trunks.[/caption]
Source - Style CrazeBalcony Garden Web

Thursday, 23 August 2018

Grow Raspberries and Blackberries

If I could grow only one fruit, it would be raspberries. They're my favorite to eat, and unaffordable in the markets, even during berry season. Fortunately they're very easy to grow in hot climate, and for the most part they're trouble-free. If I lived in the south where raspberries do less well, I'd grow some gorgeous fat blackberries, which like hot climates. Raspberries and blackberries are known as "bramble fruits" because they are so thorny surely a deliberate move on nature's part to make them harder to pick. Like roses, they are an exquisite prize that you earn only by putting up with a little aggravation.
Bramble fruits are perennial plants that bear on biennial canes. This means that the roots live indefinitely and send up canes each year that generally fruit the second season, and then die. By removing dead canes that have finished fruiting and letting the new ones grow, you can maintain a berry patch for many years. Since the patch is a permanent planting. It's worth spending some time at the beginning to figure out just which berries you should grow. Red raspberries appear in early summer, usually in July although there are some fall-blooming varieties.
They bear for a few blissful weeks during which you gobble as many fresh raspberries as you possibly can. Since they don't keep well, then freeze the rest or make them into jam. You can stretch this early-summer Nirvana to a month or more by planting several varieties that ripen at slightly different times. Yellow raspberries are excellent for home growing too.
They are very sweet but not quite as appealing to birds as the red ones are. You rarely find yellows for sale in markets, since they don't ship well. So they make a special home-grown treat to serve alone or mixed with red and black raspberries. They grow exactly like red raspberries, on sturdy, erect plants, and many are hardy even in Zone 3.
Both red and yellow raspberries send up new canes from the crowns and also from the roots as suckers. So even if you plant only a few you will soon have many. Raspberries and other brambles are self-fertile, so you need only one variety to ensure pollination though some growers maintain that their yield is greater if they grow two.
Black raspberries, also called "black caps," are quite different from red ones. Their canes are arching or trailing and send out vigorous fruiting side branches. Although red raspberries are borne mainly on the long and slender canes and black raspberries don't produce the multitude of suckers that red raspberries do. Most are hardy only to Zone 5 or 6, but unlike the red ones, black raspberries will tolerate a fair amount of heat. Their flavor is also a bit more tart and rich, making them a superb choice for baking, for ice cream or for jams. Purple raspberries, a cross between black and red, grow much like the black ones, though they are often more hardy.
You can also plant ever-bearing raspberries for a fall harvest. These don't really bear all summer; rather, they have two crops, one borne on second-year canes at the usual time, and another borne in fall on the tips of new canes produced that season. If you cut these back after the fall harvest you will sacrifice the summer crop, but this means that the fall one will be bigger. I prefer to grow them this way, for a big fall crop. I can always plant a standard summer-bearing variety for the early crop. Ever-bearing varieties can be the red or yellow.
Blackberries are larger than raspberries and a bit less sweet. They are also less cold-hardy and do best in moderate or warm climates. The plants are extremely vigorous and vary as to their growth habits: some have strong, erect canes; others are trailing and will lie on the ground unless supported; still others are semi trailing. Some varieties are thorn less. Boysenberries and loganberries—both of which are large and wine colored, growing on trailing plants—are simply blackberry varieties.
Site for Raspberries and Blackberries
The best site for bramble fruits is a slightly sloping, sunny hillside where cold air drains away. They will take a bit more shade than other fruits, but a sunny location will provide a better yield, especially in cool climates. Avoid sites where any of the Solanaceae have grown in recent years (page 184), since these all share with brambles a susceptibility to the verticillium wilt virus. It is also best to separate red and black raspberries by 300 feet, if possible, since seemingly healthy red plants can transmit diseases to the less-resistant blacks. Wild raspberries and blackberries can also transmit diseases, so it is wise to eradicate any you have on the property. Be sure to pick a well-drained site; none of the bramble fruits will grow where it's mucky.
Soil for Raspberries and Blackberries
Most soil types will grow bramble fruits as long as drainage is good. Moderate fertility is sufficient, though the plants will appreciate sonic bone meal and some rotted manure or compost worked into the soil. The more organic matter 10 the soil, the better; it will help the soil to hold moisture.
The soil should be slightly acid about 6.0 is ideal, but a range of 5.5 to 7.0 is acceptable. Remember that this is a permanent bed, and all weeds, rocks and other obstacles to good growth must be removed at the beginning. The soil should be enriched, lightened and well tilled throughout the bed before you do your planting.
Planting Raspberries and Blackberries
It is very important to buy certified virus-free plants. Your neighbors will tempt you with offers of free raspberry plants when it's time to weed out the suckers between their rows. Turn them down, or there's a chance you'll start out with diseases you'll never get rid of. Root nematodes can also get started in your garden this way, and the nursery you buy from should be able to guaran¬tee their stock to be free of these, too.
Planting time is early spring, except in Zone 6 and southward, where fall or even late-winter planting is possible. You don't have to buy very many plants of each variety, especially red raspberries. Keep in mind that in a few years you'll be throwing out extras. A dozen plants, spaced 3 feet apart, will soon give you a large harvest, with each foot of row producing about a quart of berries. Hence, plant blackberries and black raspberries about 4 feet apart, trailing blackberries 5-6 feet apart.
If I'm planting more than one row I make sure that the rows are pretty far apart a good 10 feet is best. When I'm pruning or picking I like to be sure that no wayward canes will reach out and grab me from behind. If you are using a trellis system you can space the rows more closely. Make sure that the roots do not dry out between the times of buy them and the time you put them in the ground.
And moisten your plant holes. Moreover, plant raspberries a few inches deeper than they were growing in the nursery, blackberries at about the same level. Cut red raspberries and blackberries back to 6 inches, but cut black raspberries back to ground level as a precaution against disease. Then water the plants some more.
Growing for Raspberries and Blackberries
It is very important to give all bramble fruits a constant water supply while they are growing and especially when they are forming fruit. A good thick mulch of an organic material such as salt hay will help a lot. It will also keep weeds from working their way into the berry plants' root systems. In addition, mulch will keep you from having to cultivate the soil. This is an important advantage, as cultivating can nick the plants' shallow roots. Which in the case of red raspberries can promote excess suckering?
But even with mulch, you should watch soil moisture. If it's dry weather and a crop is ripening, laying a soaker hose along the rows will definitely increase your yield. Top dress each year in early spring with at least a shovelful of compost or rotted manure for every foot of row, or apply a handful of commercial fertilizer such as 10-10-10 to the same area. The most important job in growing bramble fruits is keeping the plants properly pruned so that the bed does not become an impenetrable tangle of thorny canes. Each berry type has a different way of run rampant, but fill rampant it will.
Red and yellow raspberries, doesn’t branch much but they do send up lots of canes. Every year in early spring you should go out to the raspberry patch, wearing a long-sleeved shirt and leather gloves, and prune out any winterkilled canes at ground level. Then cut hack all the remaining canes in about chest height. You will see what remains of the little berry clusters after the herrios have been removed. Stole let the job go until winter or early spring, you'll still be able to distinguish the old canes because they are darker, with peeling bark. Any part of the plant that looks diseased should be removed at whatever time you spot it.
1 don't bother to use any kind of a trellising system with red or yellow raspberries, because the stiff canes support themselves so Well. I use the hedge-mw method, just letting the row fill in with new plants until it gets about I V: to 2 feet wide. Any wider than that, and it's hard to match and pick. Every spring, I pull up all the suckers that come between the rows and later in the season too, as they appear. It is also a good idea to thin the plants within the rows, pulling up some of the new canes so that the remaining canes are about 6 inches apart.
Some gardeners do use a trellis sys-tem for raspberries, either because they find them easier to pick this way, or because they're short of space. Trellised rows can be as close together as 5 feet. Keep in mind, though, that the farther apart they are the better the air circulation, and the less chance of disease. You can use a system similar to the four-arm system for grapes. Or you can box the vines by running wires on either side of a thick wooden post, trapping the vines between the wires. Also nail 2-foot crosspieces to the posts, as on a telephone pole, to make a wider box. You can also just place metal stakes 2 feet apart and string wires along those. Brace the end posts to keep them front bending.
Black raspberries don’t sucker freely. Their way of running amok is to bend over their long canes so that the tips root in the soil between your rows. If you let them do this, pretty soon you won't have any rows, just solid berry bushes. Cut off the new canes to about 2 feet tall in midsummer. They will cause them to form lateral branches, which will bear fruit next year. In early spring cut back each of those lateral branches to about 12 inches long.
Then after harvest cut back the canes that have fruited, just as you do with red raspberries. If you prune them this way you can keep the plants fairly short and erect, so you shouldn't need to trellis them. Thin the rows as needed, and pull up any plants growing between them.
Ever-bearing raspberries bear the first year, in fall, at the tips of the canes. It you want a second crop, cut off the tips after harvest. Then the following season they'll bear on the uncut portion in early summer. Then cut back the whole cane after it finishes fruiting. Both crops will be smaller than that produced by ordinary summer-bearing raspberries. To get one big fall crop instead and simplify your pruning job as well cut all the canes back to the ground after the fall harvest.
If you're growing blackberries, then cut the first-year canes hack to 3 feet in midsummer to encourage lateral branches, which will bear fruit. The In late winter or early spring cut each lateral branch to about half its length. So, after harvesting and cut back at soil level canes that have borne fruit. Thin the new canes so that they are about 6 inches apart. Whether or not you trellis black berries depends on what type they are. If they have erect canes and you prune them well, they can stand alone like raspberries.
If they are trailing or semi trailing, they’ll need some kind of support. You can bunch the canes together and tie them to stout stakes.  But they'll enjoy better air circulation if you train them on wires. Either use the four-armed system mentioned for grapes. And also trying a number of canes to each wire and letting a few trails along the ground as well. You can also use the box system. With trailing varieties you'll have to tie the canes to whatever support you use.
Propagating new bramble plants is easy. Do it at the time you would normally plant them in your area. For red raspberries just dig up some suckers and replant them. For black raspberries bend a cane over and bury the tip in a pocket of enriched soil, anchoring the tip with a rock or a bent wire just as you do with a stem you are layering. Blackberries can be propagated by replanting suckers, by rooting the tips of canes. Or by digging up some roots on the edge of an established clump and replanting them. With all these methods, cut the stems back to the appropriate height when you replant.
Pests and Diseases
There is a long list of diseases of bramble fruits, though yours may escape all of them, especially in cool climates. Fortunately there are a number of things you can do to keep berries healthy, even in areas where diseases are common. First, buy new, clean stock. Remove all plant debris winterkilled stems, canes that have home fruit, and any diseased parts of the plant as promptly as possible, and either burn the debris or cart it away. Don't leave it lying around the property, even in the compost heap.
Remove all wild bramble plants from the property. Try to provide the plants with good air circulation by choosing the right site, pruning and thinning the canes, and trellising them if necessary. Provide good water drainage for the roots. Feed, water and mulch as needed to keep the plants vigorous, but avoid giving them excessive nitrogen. Finally, seek out varieties that resist specific diseases that are prevalent where you live.
Some diseases to watch for are mosaic, which makes leaves yellow and mottled. Botrytis cane wilt which makes new canes wilt, verticillium wilt, which causes canes to wilt suddenly in hot, dry weather. Anthracnose produces purplish spots on the leaves then grayish growth on the stems powdery mildew. It covers the leaves with whitish powder; orange rust shows up as bright orange pustules on the undersides of the leaves. Leaf curlvirus makes the leaves dark green and tightly curled; and spur blight, which produces brown spots on the canes.
Foil hungry birds with plastic netting if they're getting too much of your crop. If you have lots of berries and pick often you may not find birds a big problem. The netting can be draped over the plants, but it is hard to remove for pruning and picking that way. So you may want to erect a lightweight wooden or metal frame to support it. This can be either box-shaped or constructed like a frame house.
Japanese beetles bother raspberries, pick them off or use milky spore disease Hose off aphids, or spray them with insecticidal soap they can transmit diseases. Prune out canes infested with borers and remove plants with galls that indicate crown borers, Fruit worms. Which eat the buds and the berries, can be sprayed with rotenone; the soil should then be cultivated around the plants in late summer and early fall to keep the worms from overwintering there as pupae. A few raspberry varieties, such as 'Purple Royalty,' are insect resistant.
Harvest Raspberries and Blackberries
Pick berries only when they are ripe, but don't let them sit on the bush too long. Pick at least twice a week when they are bearing. Be careful not to squeeze the berries; just pull them off the stem gently. (Raspberry cores will stay on the stems.) Keep your pail or basket in the shade as you pick, and don't let the berries get more than a few inches deep in the container or they'll squash. Put in the refrigerator until you're ready to use them.
Varieties of Raspberries and Blackberries
For summer-bearing red raspberries, the old standby 'Latham' is fine, but there are other good choices too. 'Newburgh' is vigorous, hardy, productive and disease resistant, with a big berry. 'Canby' and the very large 'Thornless Red Mammoth' have practically no thorns, for easy picking `Reveille,' Sunrise' and the huge 'Titan' arc extra early.
'Taylor' is hardy, vigorous and especially fine tasting. 'Willamette,' a large, dark red berry, is recommended for the west coast, and the vigorous 'Dorman Red' is the one to grow in the south. The ever bearing ‘Fallgold’ is the most popular yellow variety. Of the ever-bearing reds, 'Heritage' is the most universally grown, but the hardy, disease resistant ‘Fall Red' is well worth trying. 'Scepter' and 'Indian Summer' also have good disease resistance. Popular black raspberries include the vigorous, upright standby 'Bristol' and 'Black Hawk,' which is both disease and heat resistant.
Especially cold hardy varieties are the large `Cumberland,' John Robertson' and the disease-resistant `Jewel.' Allen' is sweeter than most. For purples try the large, sweet 'Royalty,' which is hardy and both insect and disease resistant. ‘BrandyWine’ is a good, fairly hardy, tart variety that people favor for jams.
`Lowden Sweet Purple' is anthracnose resistant and almost seedless. Good erect blackberries for the south include 'Cheyenne' and the sweet early ‘Rosborough’. ‘Darrow' and oily King' are hardy upright varieties. ‘Boysenberry’ ‘Loganberry' and 'Lucretia Dewberry' are tasty trailing varieties. Among the thorn less blackberries `Chester' and 'Hull’ are especially hardy, and Black Satin and `Thorn free' especially disease resistant. Moreover also try Thornless Boysenberry. Also Read: Why You Need to Eat More Vegetables?
 

Thursday, 16 August 2018

Growing Method of Broccoli

I have a great respect for Broccoli because it appreciates the cool climate in which we live. In a long, cold spring, a summer with little sun, or a fall with no Indian summer, there is always Broccoli and all it asks is that I keep up with the picking. Gladly I can keep up with the picking and make a whole meal out of Broccoli, olive oil and garlic. Our basic green broccoli, sometimes called “sprouting broccoli” and ‘calabrese’ in Europe, came originally from Italy. It makes a big plant with deep, spreading roots. Broccoli is an edible green plant in the cabbage family whose large flowering head is eaten as a vegetable.

The big broccoli “bunch” that you buy in the grocery store, really an immature flower head, is usually only the beginning for the home usually only the beginning for the home gardener. After the central cluster is cut  back, side shoots develop that can be back, side shoots develop that can be harvested for a long time if the summer is not blistering hot. In warm-summer climates the tight buds will “rice,” or open as flowers too soon, thus ending the crop, so southern gardeners plant at all crop that will bear well into the winter instead.

Select Site for Broccoli

Choose a spot with good drainage and air circulation where broccoli and other members of the genus Brassica have not grown for several years. Full sun is nice, but partial shade will also sustain broccoli and can even retard bolting. The plot need not be large. Even though the plants get fairly sizable (2-2 1/2 feet tall and spread) each one produces a lot of broccoli. Six plants in a 4-foot-by-6-foot plot is a good number to start with. Passionate broccoli eaters will want more.

Select Soil for Broccoli

Soil should be fairly rich to begin with. As a leaf-and-stem crop, broccoli needs plenty of nitrogen. I dig in a shovelful of well-rotted manure for. Each plant you could substitute a shovelful of compost or a small handful of 10-10-10. Calcium is important; you can make sure it is there by adding crushed limestone. Keep in mind that this will also raise the pH—something you would want to do anyway if your soil is acid. The ideal for broccoli is a neutral 7.0. It is even more important to add organic matter to the soil, to help it retain the steady moisture supply that broccoli needs.

Planting Broccoli

In planting broccoli there are several schedules you can follow. Start seeds indoors in a sunny but cool place, six or seven weeks before the last average frost date. And set the seedlings out as 5- to 6- inch plants, two or three weeks before the last expected frost. Or you can sow directly in the garden; in a cool climate. So you can do this a month or two before the last frost; in a warm one do it in very early spring. Usually broccoli is grown from seedlings transplanted into the garden. Either ones you grow yourself or ones you purchase in a nursery.

After preparing the planting holes as described above, set the transplants an inch or two lower in the ground than they were in their pots or flats, watering them and firming the soil around them. Cover the young plants if you think there might be a really hard freeze. Though, the space seedlings about 18 inches apart each way if you are using a grid, or 18 inches apart in rows with 2-3 feet between the rows. For direct seeding in the garden, sow several seeds in hills and later snip off all but the strongest plant in each. Space the hills the same distance apart as you would transplants.

Cutworms like young broccoli plants, so it is a good idea to use collars to roil them whichever planting method you use.  Where summers are hot, people seed in a second crop in late spring or early summer. That will mature alter danger of ricing is past, or they sow a later crop for fall harvest. A crop can even be sown in fall and wintered over for a spring harvest if winters are mild.
To save space the early crops can be inter-planted with something else if the plants are wide enough apart. Fall crops are seeded in July or August. Good mulch will help the plants retain moisture. But in times of drought give them a good long soaking with a hose if the soil is dry. Extra enrichment is really needed only when you’re trying to hasten maturity to beat the heat. In this case a side dressing of blood meal or fish emulsion soaked in (not dug in) helps.

Pests and Diseases

The only pest that ever bothered my broccoli was the small green cabbage worm, which is very common. It never did much damage to the plants, but it had a way of turning up as a surprise garnish at the dinner table. Well camouflaged by its color, even after picking, the worm turns white when cooked. “Good protein!” a well-brought-up dinner guest may exclaim diplomatically, but unless your diners have an unusually good sense of humor, you’ll want to check ‘carefully for worms before cooking or soak the broccoli in salt water to kill and dislodge them.

If they really chew up your plants, catch them early next year by applying rotenone or BT when you see the cabbage white. Moreover, butterfly fluttering above them, though you might prefer author Catherine Osgood poster’s method. She goes out and swats the butterflies with a tennis racket. Spray off aphids, and foil root maggots with tar-paper mats. Most hugs won’t bother your late crops. Diseases like blackleg, black rot and clubroot are best prevented by crop rotation. In the case of clubroot (puny, yellowed plants with misshapen roots), boost the pH to 7.0 with some lime.

Harvest Broccoli

When the first nice bunch has formed in the center of the plant (it won’t be huge, like the one in the store, unless it is a large-head variety), cut it off at 4-6 inches with a sharp knife. New ones will form in the leaf axils around it, and all over the lower stalk. If you don’t keep picking, the green heads will send up tall yellow flowers. A row of blossoming broccoli looks beautiful.

But is embarrassing to a good gardener, for it means that the plant will stop producing edible stalks. So keep up with the picking, even if you cannot keep up with the eating and freezing. You can cook and eat stalks with flowers that have started open. But the opened buds turn brownish when cooked and look almost as unappetizing as cooked cabbage worms.

Broccoli Varieties

The popular broccoli varieties are ‘Waltham 29,’ the early `DeCicco,’ and ‘Calabrese’ (`Green Sprouting’). Most people prefer the ones with good side-shoot production, not the ones that produce just a one-shot head like the ones sold in stores, although sometimes this is exactly what you want, either for a quick spring crop before a hot summer, or to make freezing the crop more efficient. ‘Green Comet Hybrid’ is a good fast maturing variety for this purpose.

‘Premium Crop’ is a good single-crop variety. ‘Green Duke’ is a good variety for the south. Another kind of broccoli that is recently very popular is broccoli raabor raaba or rabb or di rapa, depending on how you spell it. This is grown by direct seeding in rows or blocks. It never forms a head at all, just small branches. Both these and the young leaves are tender and delicious. Also Read: Amazing Health Benefits Of Sapota Fruits


Hi